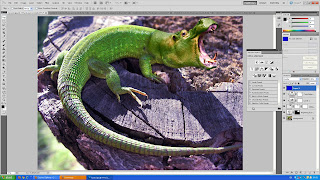
First I used an image of a hippo from MOODLE, and one of a lizard. I shrunk the image of the hippo to line it up with the lizard's head.
Next I used an adjustment layer to alter the colour of the hippo to make it match with the lizard. I used a hue/saturation layer.
Afterwards I used another adjustment layer, this time it was a colour correction layer to adjust the lighting so it matches the photograph of the lizard.
With the colour correction layer selected I used a mask layer to get rid of tyhe green inside the hippo's mouth, eye and ear to reveal the flesh colour.
Then I used the clone stamp tool to cover over the lizard's nose with the texture of the tree trunk to make it authentic.

And here is the final piece.
I am happy with the final image, I especially like how I've blended the head onto the neck in a realistic manner.
Here is one of the source images.


No comments:
Post a Comment